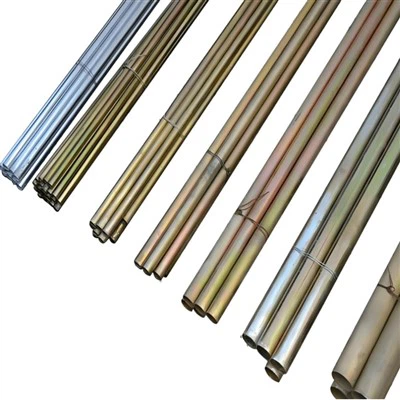
Hey there! As a KBG Conduit supplier, I'm super stoked to share with you how to install KBG Conduit in a cable tray. It's not as complicated as it might seem, and with the right steps, you'll have it up and running in no time.
First things first, let's talk about what KBG Conduit is. KBG Conduit, which you can learn more about here, is a type of compression type galvanized thin-walled wire conduit. It's widely used for protecting electrical wires and cables in various applications, like commercial buildings, industrial facilities, and even some residential setups.
Pre - installation Preparations
Before you start installing the KBG Conduit in the cable tray, you've got to do some prep work.
1. Gather Your Tools
You'll need a few basic tools for this job. A hacksaw or a pipe cutter is essential for cutting the KBG Conduit to the right length. You'll also need a tape measure to measure the conduit accurately. A screwdriver, either flat - head or Phillips - head depending on the type of fasteners you're using, is necessary for attaching the conduit to the cable tray. And don't forget a level to make sure everything is straight.


2. Plan Your Route
Take a good look at the area where you'll be installing the cable tray and the KBG Conduit. Decide on the best route for the conduit to follow. Consider factors like avoiding sharp bends, keeping it away from heat sources, and making sure it's easily accessible for future maintenance. Mark the route on the cable tray using a marker or tape.
3. Check the Cable Tray
Inspect the cable tray to make sure it's in good condition. Look for any damage, like dents or sharp edges, that could potentially damage the KBG Conduit. If you find any issues, repair or replace the cable tray as needed.
Cutting the KBG Conduit
Once you've got everything prepped, it's time to cut the KBG Conduit.
1. Measure and Mark
Use your tape measure to measure the length of conduit you need. Mark the cutting point on the conduit with a marker. Make sure your measurement is accurate, as a wrong cut can lead to problems later on.
2. Cut the Conduit
If you're using a hacksaw, hold the conduit firmly in place and start sawing at the marked point. Use a steady, even motion. If you're using a pipe cutter, place the cutter around the conduit at the marked point and tighten it. Then, rotate the cutter around the conduit, tightening it a little more each time until the conduit is cut. After cutting, use a file to smooth out any rough edges on the cut end of the conduit.
Installing the KBG Conduit in the Cable Tray
Now comes the main part - installing the conduit in the cable tray.
1. Position the Conduit
Place the cut KBG Conduit along the marked route on the cable tray. Make sure it's aligned properly and sits flat on the tray. You might need to adjust the position slightly to get it right.
2. Secure the Conduit
There are a few different ways to secure the KBG Conduit to the cable tray. One common method is to use conduit clamps. Place the clamps at regular intervals along the conduit and tighten them using a screwdriver. Make sure the clamps are tight enough to hold the conduit in place but not so tight that they damage the conduit.
Another option is to use brackets. Attach the brackets to the cable tray first, and then place the KBG Conduit in the brackets. Secure the conduit in the brackets using screws or other fasteners.
3. Make Connections
If you need to connect multiple pieces of KBG Conduit together, you can use couplings. Slide the coupling over one end of the conduit, then insert the other end of the conduit into the coupling. Make sure the connection is tight and secure. You can also use flexible conduit junction boxes, which you can learn more about here, at points where the conduit needs to make a turn or connect to other components.
Testing and Final Checks
After you've installed the KBG Conduit in the cable tray, it's important to do some testing and final checks.
1. Check for Proper Alignment
Use a level to check that the KBG Conduit is straight and properly aligned. If it's not, adjust the clamps or brackets as needed.
2. Inspect the Connections
Go over all the connections between the conduit pieces and the connections to the cable tray. Make sure everything is tight and secure. Look for any signs of looseness or damage.
3. Test the Cable Placement
If you're planning to run cables through the KBG Conduit, try running a test cable through it. Make sure the cable can pass through the conduit smoothly without getting stuck.
Why Choose Our KBG Conduit?
As a KBG Conduit supplier, I can tell you that our products are top - notch. Our Compression Type Galvanized Thin - walled Wire Conduit is made from high - quality materials, ensuring durability and long - term performance. It's also easy to install, as you've seen from the steps above.
If you're in the market for KBG Conduit or any related products, don't hesitate to reach out. We're here to help you with all your conduit needs. Whether you're a professional electrician working on a large - scale project or a DIY enthusiast doing a small home improvement job, we've got the right products for you. Contact us today to start a procurement discussion and find out how we can meet your specific requirements.
References
- Electrical Installation Handbook, various editions
- National Electrical Code (NEC) standards
- Manufacturer's installation guides for KBG Conduit and cable trays