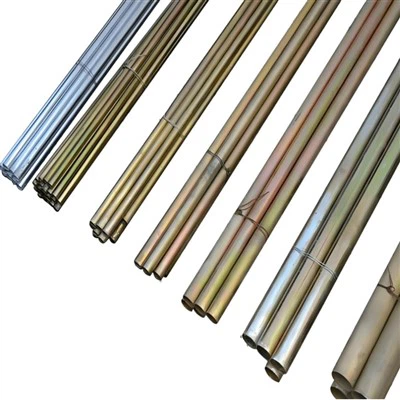
Hey there! I'm an embedded metal conduit supplier, and today I'm gonna walk you through how to install embedded metal conduit in a factory. It might sound a bit technical, but trust me, with the right steps and a bit of know - how, it's doable.
1. Planning and Preparation
First things first, you gotta plan out the whole installation. Look at the factory layout and decide where exactly you want to run the conduits. Think about the electrical equipment that needs wiring, like machines, control panels, and lighting fixtures. You need to figure out the shortest and most efficient routes for the conduits to avoid any unnecessary bends or long runs that could cause problems later.
Measure the distances accurately. You don't want to end up with too much or too little conduit. Make a list of all the materials you'll need, including different sizes of embedded metal conduits, connectors, straps, and junction boxes.
Also, check the local electrical codes and regulations. These rules are in place to ensure safety, so you gotta follow 'em. Some areas might have specific requirements for the type of conduit, its installation method, or grounding.
2. Gathering the Right Tools
Once you've got your plan, it's time to gather the tools. You'll need a few essentials like a hacksaw or a conduit cutter to cut the metal conduits to the right length. A reamer is also crucial to smooth out the edges of the cut conduit, so you don't damage the wires inside.


A drill with appropriate bits will be needed to make holes for mounting brackets and junction boxes. For bending the conduits, a conduit bender is a must - have. There are different types of benders, like hand benders for small - diameter conduits and hydraulic benders for larger ones.
Don't forget about measuring tools like a tape measure and a level. A level will help you make sure the conduits are installed straight and level, which is important for both aesthetics and functionality.
3. Installing the Conduit Supports
Before you start laying the conduits, you need to install the supports. These supports will hold the conduits in place and prevent them from sagging or moving around. You can use straps or brackets made of metal or plastic, depending on your needs.
Mark the locations for the supports along the planned route of the conduits. Make sure they're evenly spaced to provide proper support. Drill holes in the wall or ceiling at the marked locations and insert wall anchors if necessary. Then, attach the supports using screws or bolts.
4. Cutting and Bending the Conduits
Now it's time to cut the conduits to the right lengths. Place the conduit on a stable surface and use your hacksaw or conduit cutter to make a clean cut. After cutting, use the reamer to remove any burrs or sharp edges.
When it comes to bending the conduits, it's important to do it carefully. Measure the angle and length of the bend you need. Then, use the conduit bender to make the bend. Start by marking the bend point on the conduit. Insert the conduit into the bender and align the mark with the appropriate bending indicator on the bender. Apply pressure slowly and steadily until you reach the desired angle.
5. Connecting the Conduits
Once you've cut and bent the conduits, it's time to connect them. You can use different types of connectors, like couplings or elbows. Make sure the connectors fit snugly onto the conduits.
Clean the ends of the conduits before connecting them to ensure a good seal. Some connectors might require the use of a sealant or tape to prevent moisture or dust from getting inside the conduit.
6. Installing Junction Boxes
Junction boxes are important for providing access to the wires inside the conduits and for making electrical connections. Place the junction boxes at strategic locations along the conduit route, like at corners, T - junctions, or where the conduit changes direction.
Drill holes in the junction box for the conduits to enter. Insert the conduits into the holes and secure them using locknuts or compression fittings. Make sure the junction box is properly grounded to prevent electrical hazards.
7. Pulling the Wires
After the conduits and junction boxes are installed, it's time to pull the wires through. First, lubricate the inside of the conduits to make it easier to pull the wires. You can use a special wire - pulling lubricant or even a bit of soap and water.
Attach a fish tape or a pulling string to the end of the wire. Feed the fish tape or string through the conduit from one end to the other. Then, pull the wire through the conduit using the fish tape or string. Make sure not to pull too hard, as this could damage the wires.
8. Grounding the Conduits
Grounding is a crucial step in the installation process. It helps protect against electrical shocks and short circuits. Connect the conduits to a grounding system using grounding conductors.
You can use a grounding clamp to attach the grounding conductor to the conduit. Make sure the connection is tight and secure. Also, ensure that the grounding system is properly connected to the electrical panel.
9. Testing the Installation
Once the installation is complete, it's important to test the electrical system. Check for any loose connections, short circuits, or other issues. Use a multimeter to test the voltage and continuity of the wires.
Make sure all the electrical equipment connected to the conduits is working properly. If you find any problems, go back and fix them before putting the system into full operation.
Some Special Considerations
If you're dealing with Bonding Flexible Metal Conduit, you need to pay extra attention to its bonding requirements. Flexible metal conduits need to be properly bonded to ensure electrical continuity and safety.
KBG Conduit and JDG Conduit are popular choices in many factory installations. KBG Conduit is known for its thin - walled design and easy installation, while JDG Conduit offers good corrosion resistance.
Conclusion
Installing embedded metal conduit in a factory might seem like a big job, but if you follow these steps, you'll be able to do it successfully. Remember to plan carefully, use the right tools, and follow all the safety regulations.
If you're looking for high - quality embedded metal conduit for your factory project, I'm here to help. As a supplier, I can provide you with a wide range of options to meet your specific needs. Whether you need standard sizes or custom - made conduits, I've got you covered. Reach out to me to start a procurement discussion and let's get your factory's electrical system up and running smoothly.
References
- National Electrical Code (NEC)
- Electrical Installation Handbook
- Manufacturer's instructions for embedded metal conduits and related components